RPA Claim Processing – Part 3: OCR Google Cloud Vision API

In my previous blog post (i.e. RPA Claim Processing – Part 2: Simple OCR), we have learn how to use the built-in Simple OCR to read printed text from a PDF form. This helps us to process all inbox pdf and categorize the documents to different claim categories. Let us take a step further, instead of OCR the printed form title, if we use the same technique to OCR a PDF that is filled with handwritting, we will come to realize the Simple OCR is having difficulty to get the right recognition of handwritting for us. The results of the Simple OCR i have tested are shown in the below captures (i.e. using PDF, Image, and Cropped Image). Take note of the Preview results, the result is somehow unpredictable and unexpected.
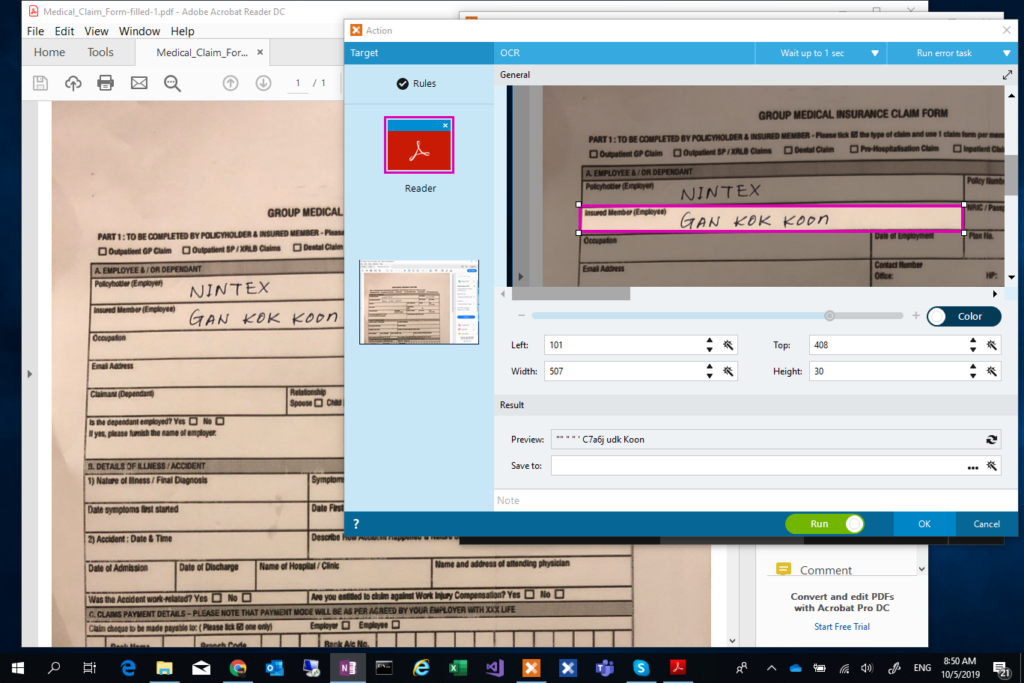
In my previous blog post (i.e. RPA Claim Processing – Part 2: Simple OCR), we have learn how to use the built-in Simple OCR to read printed text from a PDF form. This helps us to process all inbox pdf and categorize the documents to different claim categories. Let us take a step further, instead of OCR the printed form title, if we use the same technique to OCR a PDF that is filled with handwritting, we will come to realize the Simple OCR is having difficulty to get the right recognition of handwritting for us.  The results of the Simple OCR i have tested are shown in the below captures (i.e. using PDF, Image, and Cropped Image). Take note of the Preview results, the result is somehow unpredictable and unexpected. 

Figure 1: Simple OCR with PDF

Figure 2: Simple OCR with JPG Image

Figure 3: Simple OCR with Cropped JPG ImageGoogle Vision APIGoogle Vision API can detect and transcribe text from PDF and TIFF files stored in Google Cloud Storage (i.e. Google Cloud Vision API ). Unfortunately, as our users concern about having to save the entire PDF files in Google Cloud Storage, we are going to convert the PDF to Image file, and take each of the “input field” of the document to be sent to Google Vision API. Google Cloud Vision API takes base64 image for OCR purpose, there is no need for us to save the Image/PDF to the Cloud Storage. By OCR input field by field, it minimizes the effort to parse data that is for the entire document. While testing on Google Vision API, I come to realize Mathias Balslow @mbalslow  of Foxtrot Alliance has already shared a great post on How-To Use Google Cloud Vision API (OCR & Image Analysis), without reinventing the wheel, we can simply follow what was shared by Mathias on how to setup and use Google Vision API. I will be attaching my script on my testing in this article later, but without the iteration part. Below are the steps of my script:

  1. Create a list of “Input Fields” to be OCR
  2. Open the Image file and saved it to duplicate the file as current <fieldname.jpg>.
  3. Open the <fieldname.jpg>
  4. Crop the image to the area representing the input field
  5. use the REST action to send the <fieldname.jpg> to Google Cloud Vision API endpoint.

Here is the cropped image of my Fullname field:

 The Google Cloud Vision API returns the result that is very promissing to me, the returned result includes the blurry/noised field label in my case (i.e. Insured Member (Emplyee)), and the handwritten full name. The result in json format as summarized below:

{ 
   "responses":[ 
      { 
         "textAnnotations":[ 
            { 
               "locale":"en",
               "description":"Insured Member (Employee)\nGAN KOK KOON\n",
               "boundingPoly":{...}
            },
            { 
               "description":"Insured",
               "boundingPoly":{...}
            },
            { 
               "description":"Member",
               "boundingPoly":{...}
            },
            { 
               "description":"(Employee)",
               "boundingPoly":{...}
            },
            { 
               "description":"GAN",
               "boundingPoly":{...}
            },
            { 
               "description":"KOK",
               "boundingPoly":{...}
            },
            { 
               "description":"KOON",
               "boundingPoly":{...}
            }
         ],
         "fullTextAnnotation":{ 
            "pages":[...],
            "text":"Insured Member (Employee)\nGAN KOK KOON\n"
         }
      }
   ]
}

With the returned result above, it makes the parsing much easier compared to if the result consists of data of the entire document. Up to the current stage, you might be wondering do I have to get every single machine with the capability to convert the PDF to image, or if every bots we have, to categorize the documents for processing, I will be sharing and discussing on bots deployment options for the Claim Process. After that I am also planning to revisit our python code to further explore how we can overcome the challenges on parsing the return result of Google Vision API.

RPA Claim Processing – Part 2: Nintex Foxtrot Simple OCR

In a perfect world, we will have anything we need in the way we want it, but the world we living in is not perfect, so we will need to go around to get things done. If we have a local OCR system which could take any format of documents for OCR, we can simply get our scanned PDF/tiff document OCR.

In my next blog post (i.e. part 3), I am planning to send our document(s) to be OCR using google Vision API. Google Vision API only takes/supports PDF file that is stored in the cloud drive. When come to store important documents in the cloud, it concerns the banking and finance institutions users.

Before we get into Google Vision API, let us examine the built-in Simple OCR of Foxtrot. I am demonstrating the two ways I know on how to use the Simple OCR action:

Creating OCR Action with Selector (e.g. OCR an openned PDF file)

1. Open the PDF that we wanted to OCR.

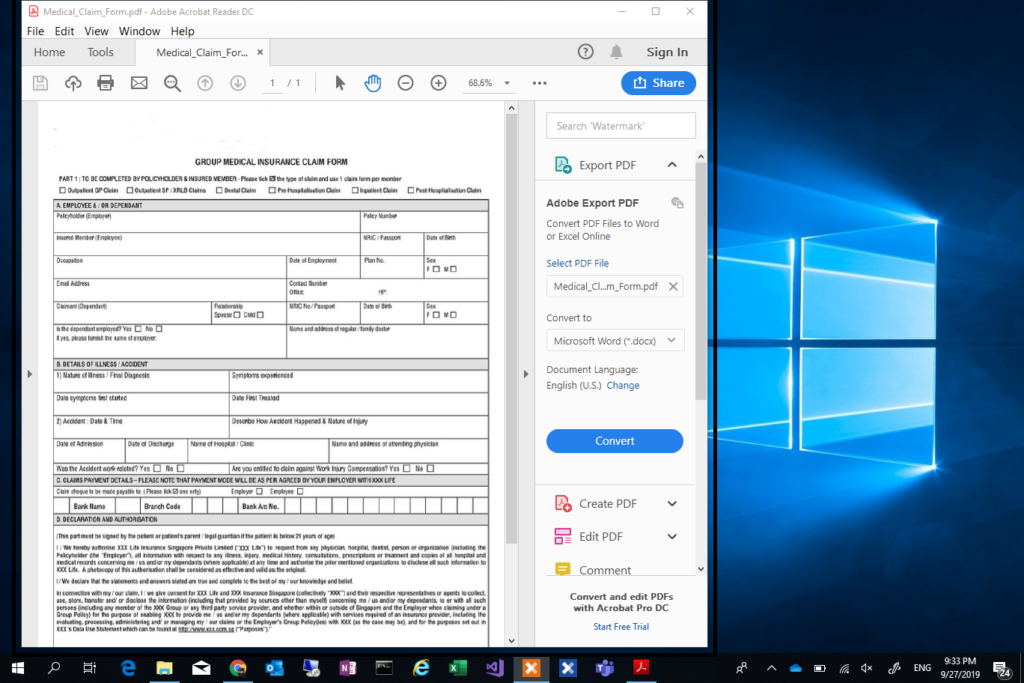
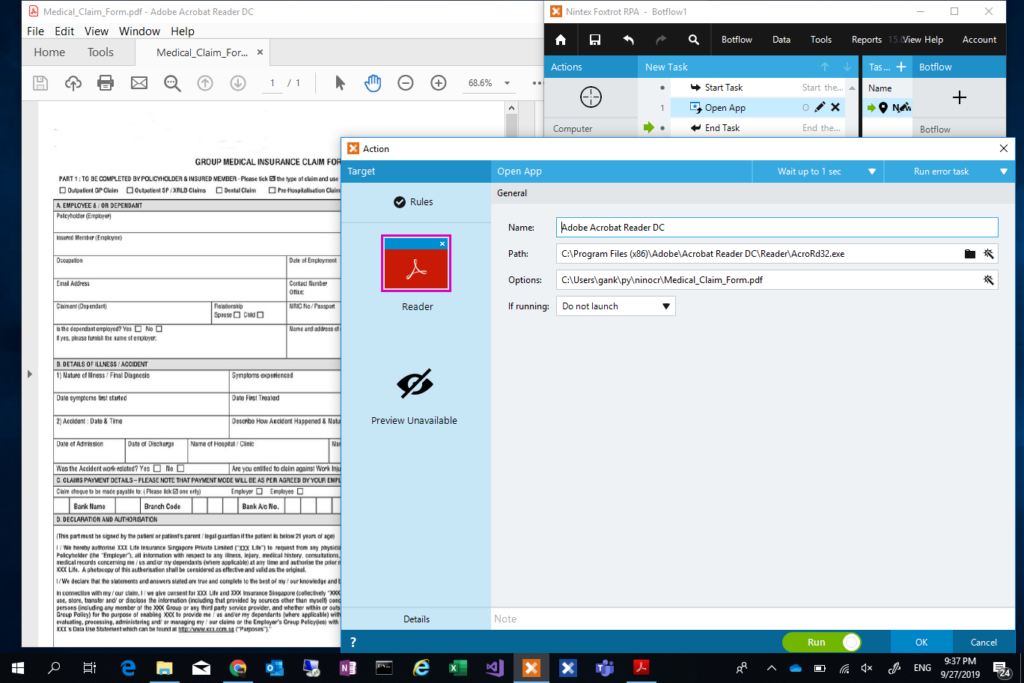
Before we could use the Selector to create an OCR action, we need to have our PDF file opened. To do that, the first step is to record an “Open App” action to open the PDF file. First, open the PDF file manually, with the PDF file opened, drag and drop the Selector positioning at the window title of the PDF file to create an “Open App” action  (i.e. screen captured below), make sure we supplied the file path in the Options field. This action once executed will open the PDF as we specified in the Options field. 

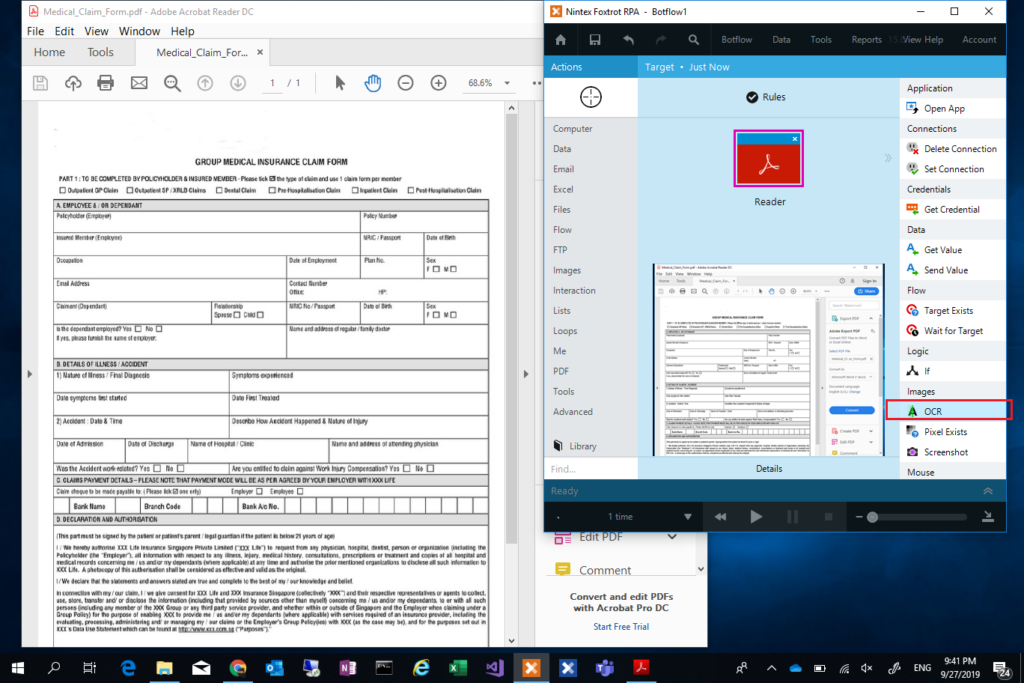
2. With the PDF document openned, we can now create an OCR action using the Selector on the opened PDF window. Drag and drop the Selector to the Acrobat Reader window, make sure the entire PDF window is now selected as shown in the below capture (i.e. boxed around the window)

3. Once we released the Seletor, we will get the “Target Preview” as shown in the below capture, select “OCR” from the Target Preview as shown in the captured below

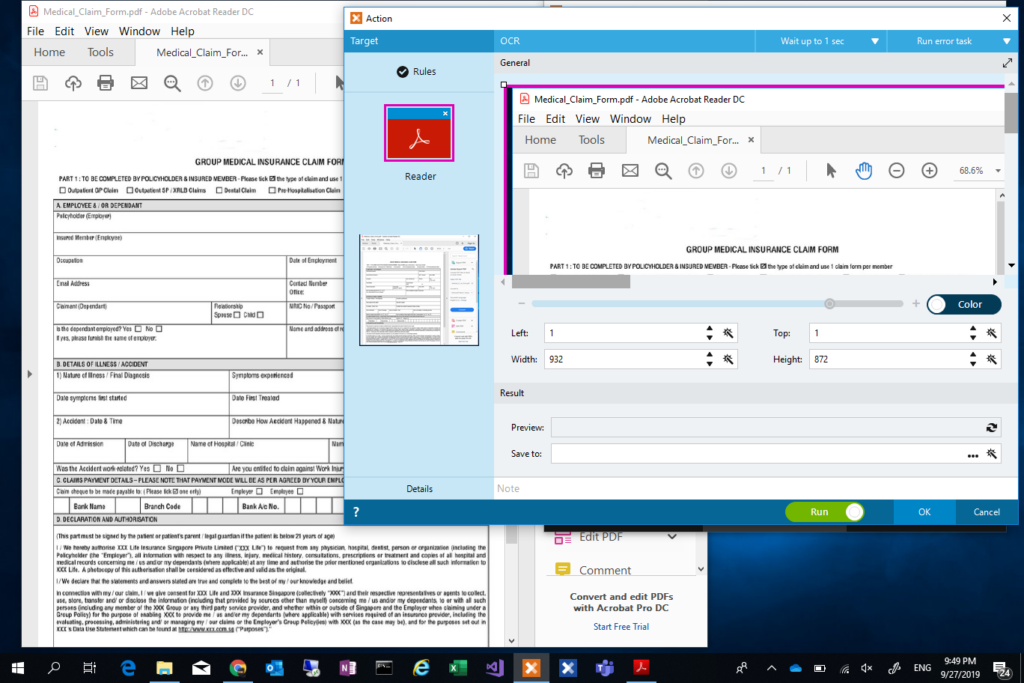
4. The above step will give us the OCR Action Builder to which we can draw a box on the PDF area we wanted to OCR.

5. As we received different type of claim forms for processing, I am using the Simple OCR to identify the Claim type by recognizing the form title. This helps me categorizes Claims into different categories. 

I am so far happy with what the Simple OCR action can do for me. As shown in the captured above, I have highlighted the form title “Group Medical Insurance Claim Form” for the OCR. Simple OCR action provides the Preview capability, it shows the recognition with perfect match to the actual form title.

The same technique is used and applied to form reference number in the real scenario, where each of the forms we have will have a form reference number that we can use for categorizing the documents.

Use the OCR action from the Actions panel

1. Create OCR action from Actions Panel.

We may create OCR action directly by selecting the OCR action from the Actiona Panel. To do so, select “Images group” from the Action panel followed by OCR action from the images group of actions. This step gives us the OCR action builder as shown below

This tells us using the OCR action directly, it only allows us with “Image Editor” or “Image file”. We will not be able to OCR a PDF file this way.

2. With the Image File, we can use the image file we converted in my previous blog post (i.e. RPA Claim Processing – Part 1: PDF to image conversion with Python). As shown in the OCR action builder in the below capture, the SImple OCR is promissing with perfect recognition for the Form Title of “Group Medical Issurence Claim Form”.

With this exercise, hope we are now more familiar with the built-in Simple OCR action and equiped ourselves with the knowledge on how to use it.

I will be showing how we can use Google Vision API to perform tasks I have challenge getting it done using the Simple OCR action. More importantly, how we address the concerns on sending and store the entire document on the cloud for the OCR purpose.

For more details on the PDF to Image conversion, you may visit my previous blog post RPA Claim Processing – Part 1: PDF to Image Conversion with Python 

RPA Claim Processing – Part 1: PDF to Image conversion using Python

In receiving hundreds of Insurance Claims per day, we going to look into how RPA solution can help insurance companies save efforts and money hiring tens of people to do the capturing of claims, from scanned documents to claim processes.

In this blog post, I am going to share how I convert a PDF file to an image for the OCR purpose. Converting PDF to image is not a mandatory step, but in the RPA Claim Processing exercise, it is a step I will need to overcome challenges that we going to discuss later.

We will need some basic setup for the PDF to Image Conversion purpose, this is shared in the following paragraphs.

Environment and Steps Setup:

1. Python 3.7.4 

2. ImageMagick 6.9.10 Q8 (64-bit) 

3. Project speicific Python Virtual Environment 

4. Python Wand library package install to the virtual environment

5. creating a Python action in Foxtrot RPA

1. Install Python 3.7.4

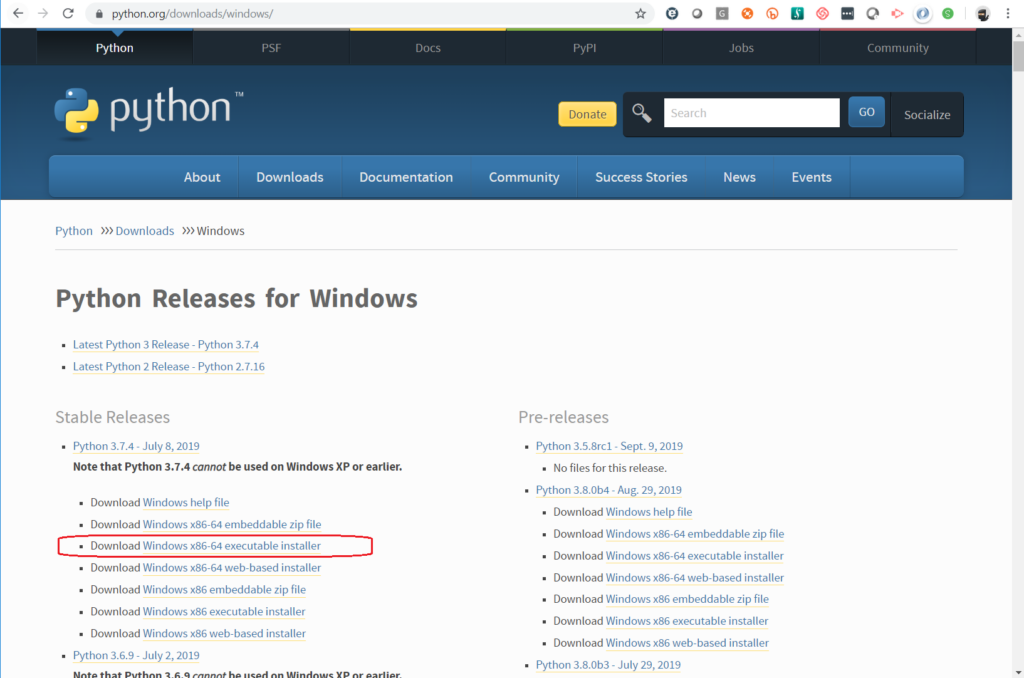
I am using Python 3.7.4 version on windows 10 for this exercise, I am making assumption if you are looking at running a python action in Foxtrot, it means you should have knowledge and with python installed in your environment. In case you don’t, you may download and install python from python.org/downloads/windows/ for the purpose of this exercise.

Below is the capture of where I’ve got the intallation for python

2. ImageMagick 6.9.10 Q8 (64-bit) 

ImageMagick is a popular open source image conversion library which has different extension or wrapper library in different programming languages. The installation can be found from the ImageMagick site at imagemagick.org. I have selected what I needed for my exercise as captured below, you will not need the ImageMagick OLE Control for VBScript, Visual Basic, and WSH if you are not going to use the library for the respective languages.

3. Project speicific Python Virtual Environment 

Following the best practice of Python development, we avoid installing packages into a global intergreter environment. We going to create a project-specifi virtual environment for our exercise. To do that simply create a virtual environment under your project folder:

py -3 -m venv .venv

4. Python Wand library package install to the virtual environment

Now, we can activate the virtual environment using the below command and to install required package for our project

.venv\scripts\activate

and install the Wand package

python -m pip install Wand

6. Create and test the Python action

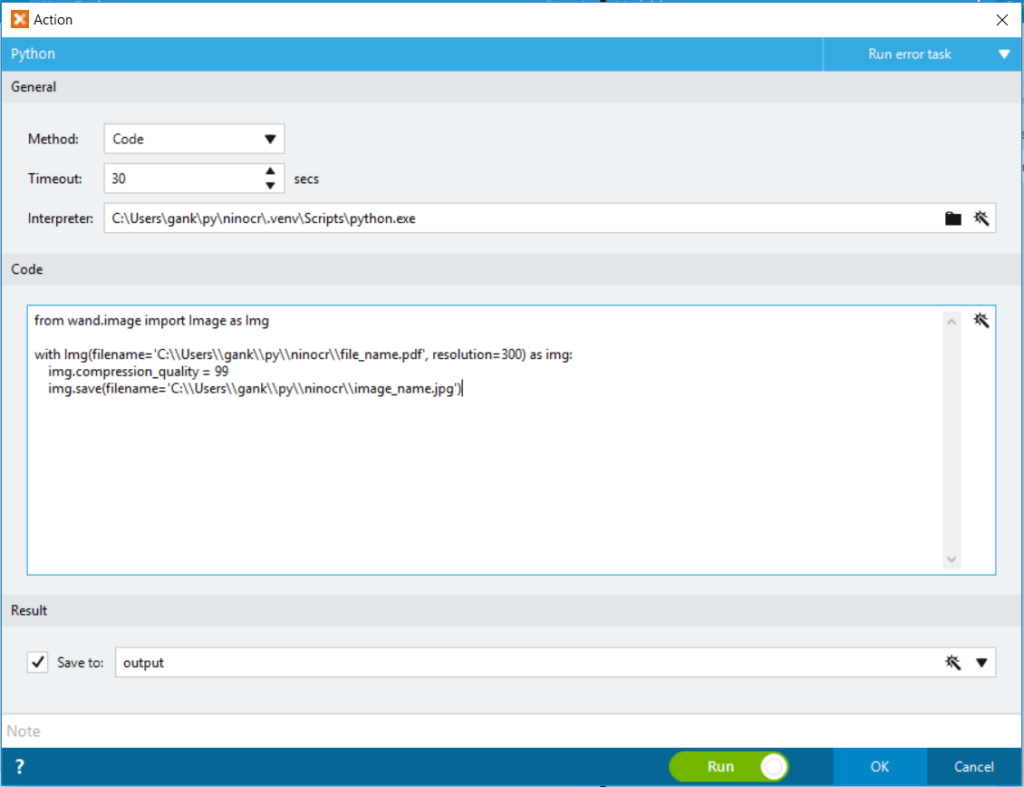
Now you may add a Python action in your Foxtrot project to convert PDF file into an image file. I have below code for the testing purpose:

from wand.image import Image as Img 

with Img(filename='C:\\Users\\gank\\py\\ninocr\\file_name.pdf', resolution=300) as img:
    img.compression_quality = 99
    img.save(filename='C:\\Users\\gank\\py\\ninocr\\image_name.jpg')

Here is the screen capture of my Python action:

With the above steps, we have successfully achieving what we need – converting any scanned PDF into a image file. This is the first part of the exercise where in the later blog post(s), we are going to OCR the image file. 

Note: Converting PDF to Image is not a mandatory steps for OCR a document, but in our scenario, I am going to use image file for the purpose, will explain further the objective behind.

Before I further explain how we going to use the converted image for the OCR purpose, let us take a look and learn about how we can use the Nintex Foxtrot RPA’s Simple OCR action, I have it covered in RPA Claim Processing – Part 2: Nintex Foxtrot Simple OCRLabels